

In Next.js 13, the introduction of new file conventions simplifies the creation of pages, shared layouts, and templates within your Next.js application. This guide will walk you through how to leverage these special files effectively.
Pages
In Next.js, a page represents the final endpoint of a route subtree and is crucial for creating distinct user interfaces. To define a page, you have the flexibility to use either .js, .jsx, or .tsx file extensions. However, it is important to note that a page.js file is essential to make a specific route segment accessible to the public.
By default, pages are Server Components, enabling server-side rendering (SSR) for improved performance. However, you have the option to configure a page as a Client Component if desired. This flexibility allows you to optimize the rendering process based on your application’s requirements.
Moreover, Next.js pages possess the ability to fetch data, offering seamless integration with various data sources. To learn more about data fetching in Next.js, refer to the dedicated Data Fetching section for detailed information and implementation guidelines.
By leveraging these features, Next.js empowers developers to create dynamic and optimized pages while providing efficient data retrieval capabilities.
Layout
A layout in Next.js serves as a user interface (UI) that is shared across multiple pages, promoting consistent design and functionality. When navigating between pages, layouts retain their state, and interactivity, and avoid unnecessary re-rendering. Additionally, layouts can be nested within each other, allowing for flexible and modular UI composition.
Layouts play a vital role in Next.js for sharing user interfaces (UIs) among multiple pages. Here’s a concise overview of Next.js layouts with a focus on SEO optimization:
- Root Layout: The topmost layout, known as the Root Layout, is mandatory and shared across all pages in your application. It should include <html> and <body> tags for proper structure and SEO compliance.
- Segment-Specific Layouts: Each route segment can define its own optional layout, which will be shared by all pages within that segment. Layouts can be nested using the React children prop, wrapping child layouts beneath them.
- Route Groups: Route Groups allow you to selectively include or exclude specific route segments from shared layouts, offering flexibility in layout composition.
- Server-Side Rendering (SSR): Layouts are Server Components by default, facilitating server-side rendering for optimal performance and SEO benefits.
- Data Fetching: Layouts can also fetch data, seamlessly integrating with various data sources. Refer to the Data Fetching section for more details.
- Data Sharing: Passing data between parent layouts and their children is not possible. However, you can fetch the same data in a route multiple times without impacting performance, as React automatically deduplicates requests.
- Route Segments Access: Layouts do not have direct access to the current route segment(s). For accessing route segments, you can utilize hooks like useSelectedLayoutSegment or useSelectedLayoutSegments in a Client Component.
- File Extensions: Layouts can use .js, .jsx, or .tsx file extensions for implementation flexibility.
- Layouts and Pages: You can define a layout.js file alongside a page.js file within the same folder. The layout will wrap the respective page component.
- Root Layout Requirements: The app directory must include a root layout, which is the only layout allowed to contain <html> and <body> tags.
- Built-in SEO Support: Next.js provides built-in support for managing HTML elements within the <head>, such as the <title> element, for efficient SEO management.
Next.js layouts enable efficient sharing of UI elements across pages, optimizing performance and providing a consistent user experience. By adhering to these guidelines, you can structure your layouts effectively while leveraging SEO benefits.
Creating layout and adding navigation
Here is the set of steps that we need to follow in order to create a simple application with a layout and navigation links to route to different pages.
Delete pages folder
In the root of your Next.js project, delete the existing pages folder. This will allow you to start with a fresh folder structure.
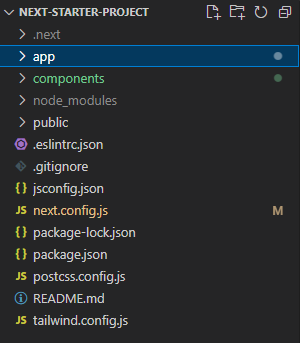
Create an “app” Folder
In the root of your project, create a new folder named “app”. This folder will house your application-specific components and pages.
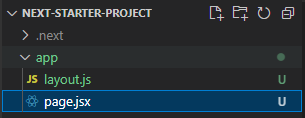
Create a Page Component
Inside the newly created “app” folder, create a file named page.jsx. A page in Next.js refers to a unique user interface (UI) that corresponds to a specific route within your application. In order to define pages, you can export a component from a page.js file. To make a route publicly accessible, you can utilize nested folders to define the route structure and place the page.js file accordingly.
//page.jsx
import React from 'react';

function page(props) {
    return (
        <div>
            Page from "app" folder
        </div>
    );
}

export default page;
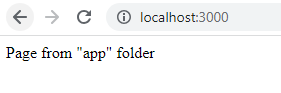
Navigating to the application in the browser, we would be able to see the screen as shown below:
Create a header component
Inside the app folder, add a new file named Header.jsx. This file will serve as the source for your custom header component. In the Header.jsx file, include the necessary code to define the header component. This component should display the header text and navigation links. Here’s an example of the code structure:
import Link from "next/link";
import React from "react";
import LogoutBtn from "../components/LogoutBtn";

const header = () => {
  return (
    <div className="header">
      <h1>Next Starter Project</h1>
      <nav>
        <ul>
          <li>
            <Link href={"/"}>Home</Link>
          </li>
          <li>
            <Link href={"/about"}>About</Link>
          </li>
          <li>
            <Link href={"/contact"}>Contact</Link>
          </li>
          <li>
            <Link href={"/"}>Login</Link>
          </li>
        </ul>
      </nav>
    </div>
  );
};

export default header;
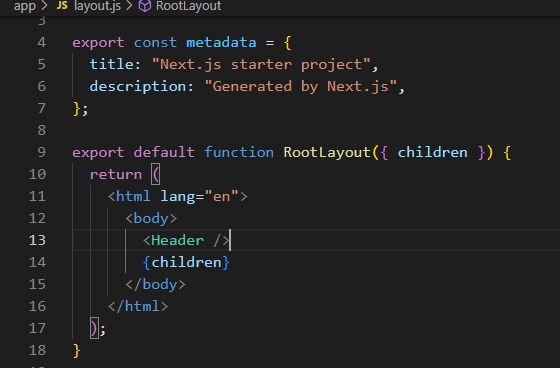
Integrate the Header Component
To include the header component in your application, import it into the root layout so that now your layout component looks something as given below:
import "../styles/app.scss";
import Header from "./header";

export const metadata = {
  title: "Next.js starter project",
  description: "Generated by Next.js",
};

export default function RootLayout({ children }) {
  return (
    <html lang="en">
      <body>
        <Header />
        {children}
      </body>
    </html>
  );
}
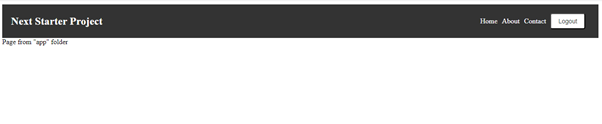
After using the root layout here, now our output would be as shown in the image below:
Conclusion
In this article, we explored the fundamentals of Next.js, including the concepts of pages and layouts. We delved into the implementation of layouts and learned how to add a custom header component to enhance the overall user experience.
By utilizing pages, we can create unique UIs for different routes in our application. Layouts play a crucial role in sharing UI elements across multiple pages, providing consistency and reusability. We saw how to implement layouts and integrate a custom header component to further personalize our application. By incorporating these techniques, we can create Next.js applications that offer intuitive navigation, visually appealing layouts, and a seamless user experience.
Some articles to learn more about React
Next.js: The Powerhouse Framework for React Projects
Demystifying Next.js Routing: Dynamic Navigation and SEO Optimization
Deploy React Application on IIS Server
Why use React?
How to Improve React Performance with Lazy Loading?
![]()


One Reply to “Next.js Pages, Layouts, and Custom Header”