

Routing is a fundamental aspect of web development, and Next.js provides a robust routing system that allows you to create and navigate between pages in your application. Understanding routing fundamentals in Next.js is essential for building dynamic and interactive web applications.
Key concepts related to routing in Next.js
Next.js provides a powerful routing system that handles incoming requests and matches them to the appropriate page component.
The routing system takes care of rendering the correct page component based on the requested URL path.
Next.js performs server-side rendering (SSR) by default, which means that the page content is generated on the server and sent to the client.
File-Based Routing
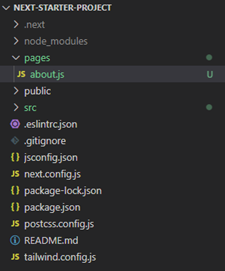
- Next.js employs a file-based routing system, meaning that each page in your application corresponds to a specific file in the pages directory.
- For example, a file named about.js inside the pages directory represents the /about the route of your application.
Dynamic Routes
- Next.js supports dynamic routing, allowing you to create routes with dynamic parameters.
- Dynamic routes are useful when you have pages with variable segments in the URL.
- You can define dynamic routes by using square brackets ([]) in the filename within the pages directory.
- You can define dynamic routes by placing the file inside the pages directory with square brackets ([]) in the filename. For instance, a file named [id].js can match routes like /users/1, /users/2, and so on, where id is a dynamic parameter.
Link Component
- Next.js provides the Link component from the next/link package to navigate between pages in a Next.js application.
- The Link component ensures client-side navigation, which improves performance by avoiding full-page reloads.
- By using the Link component, you can create clickable links that seamlessly transition the user to different pages within your Next.js application.
Programmatic Routing
- Next.js allows for programmatic routing using the Router object from the next/router package.
- With programmatic routing, you can navigate to different pages programmatically based on certain events or conditions.
Nested Routes
- Next.js supports nested routing, allowing you to create hierarchies of pages and routes.
- You can organize your pages and directories in a nested structure to reflect the desired route hierarchy in your application.
Custom Routing
- Next.js offers flexibility for custom routing by leveraging the next.config.js file.
- You can define custom routes, and redirects, and rewrite rules to customize the behavior of your application’s routing system.
Pages
- Pages in Next.js are individual components that represent different routes or views of your application.
- Each page corresponds to a specific URL path and is associated with a React component.
- Pages are stored in the pages directory within your Next.js project.
- By default, Next.js uses file-based routing, where each file inside the pages directory represents a page.
- For example, a file named about.js in the pages directory represents the /about the route of your application.
Create pages and routes
Create a new file in the pages directory
Inside your Next.js project, navigate to the pages directory. Create a new JavaScript or TypeScript file that represents the page you want to add. For example, you can create a file named about.js to add an About page.
Define the page component
In the newly created file, define a React component that represents the content and functionality of your page. This component will be rendered when the corresponding route is accessed. You can utilize Next.js’s server-side rendering capabilities and leverage React components, hooks, and any other necessary libraries or logic.
Add the code given below as the content to be displayed on the about page
export default function About() {
  return <h1>Hello, About.js!</h1>;
}
Test your pages and routes
Start your Next.js development server using the command given below if the server is not already running:
npm run devAccess your application in the browser and navigate to the newly added page using the specified route path, in our case the route would be “http://localhost:3000/about”.
Ensure that the page is rendered correctly and that the navigation links are working as expected.

Repeat the process for additional pages
If you want to add more pages and routes to your Next.js application, repeat the steps above. Create new files in the pages directory, define the page components, customize the route paths, and add navigation links as needed.
Add navigation links
If you want to create links to navigate between pages within your Next.js application, import the Link component from the next/link package. Use the Link component to create clickable links that direct the user to different pages. You can add these links in your application’s header, navigation menu, or any other appropriate location.
To add navigation links in your Next.js application, you can utilize the Link component from the next/link package. Here’s a step-by-step guide on how to add navigation links:
Import the Link component
In the file where you want to add the navigation links (e.g., a header component or a navigation bar component), import the Link component from the next/link package. You can do this at the top of your file:
import Link from 'next/link';
We are adding the link in the pages.js in our app/pages.js file, we can import the Link as shown in the above image.
Use the Link component
Within your component’s JSX code, use the Link component to create navigation links. The Link component provides client-side navigation without refreshing the entire page.
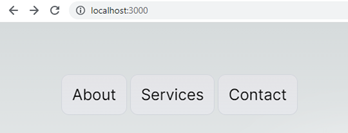
<nav>
   <Link href="/about">About</Link>
</nav>
In the example above, the href attribute of the Link component specifies the target route, in this case, /about. The text inside the Link component represents the link text that will be displayed to the user.
Add multiple navigation links
You can add multiple navigation links by repeating the Link component for each link:
<Link href="/about">
   <span>About</span >
</Link>
<Link href="/services">
  <span>Services</span>
</Link>
<Link href="/contact">
  <span>Contact</span>
</Link>
Customize the href attribute to match the desired routes for each navigation link. You can add some classes to the span tag to customize the look and feel of the navigation bar.
You can apply CSS classes or inline styles to the anchor tag within the Link component to style the navigation link according to your application’s design. To have the look and feel please clone the project from the link given at the end of the article.
Customize the route path with dynamic routing
By default, the file-based routing system in Next.js uses the filename to determine the route path. For example, a file named about.js corresponds to the /about route. However, you can customize the route path by modifying the filename or using dynamic routing techniques with square brackets ([]) in the filename.
To customize the route path in Next.js using dynamic routing, you can leverage square brackets ([]) in the filename of your page component. Here’s how you can use dynamic routing:
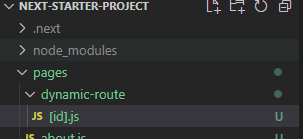
Create a new file in the pages directory
Inside your Next.js project’s pages/dynamic-route directory, create a new JavaScript file. For example, let’s create a file named [id].js.
Define the page component
In the newly created file, define a React component that represents the content and functionality of your page. This component will be rendered when the corresponding dynamic route is accessed. For example:
import { useRouter } from 'next/router';

function DynamicPage() {
  const router = useRouter();
  const { id } = router.query;

  return <div>Dynamic Page with ID: {id}</div>;
}

export default DynamicPage;
In this example, the useRouter hook from next/router is used to access the dynamic route parameter (id) from the router.query object. You can then use this parameter in your component to display dynamic content.
Customize the route path
With dynamic routing, the square brackets ([]) in the filename indicate that it is a dynamic route. In our example, the file [id].js will match routes like /dynamic-route/1, /dynamic-route/2, etc., where the id can be any value. The value of the dynamic segment can be accessed using router.query.id in the component.
Access dynamic route parameters
To access the dynamic route parameter within your page component, you can use the useRouter hook from next/router. It provides the router.query object that contains the dynamic parameter values. In our example, we accessed the id parameter using router.query.id.
Test the dynamic route
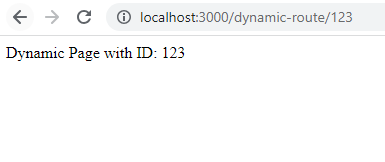
Start your Next.js development server using the command
npm run devAccess your application in the browser and navigate to a route that matches the dynamic route pattern you defined. For example, if you access /dynamic-route/123, the component will render with the dynamic value of id as 123.
By using dynamic routing in Next.js, we can create routes with variable segments and access those values within your page components. This allows for dynamic and flexible handling of different routes and enables you to build more personalized and data-driven web applications.
Some articles to learn more about React
Next.js: The Powerhouse Framework for React Projects
Next.js Pages, Layouts, and Custom Header
Deploy React Application on IIS Server
Why use React?
How to Improve React Performance with Lazy Loading?
![]()


One Reply to “Demystifying Next.js Routing: Dynamic Navigation and SEO Optimization”