

In this article, you will learn how to create a react application using create-react-app. In this article, we will use CRA to create-react-app. First of all, it is not at all necessary to use CRA there are also other ways to create react applications but we are using CRA as we won’t need to manually set up everything and focus more on the application rather than configuration settings. CRA will ease the working with Single page application.
To start working with CRA we first need to have Node.js set up in our system. So, let’s first set up Node.js in our system.
Install Node.js
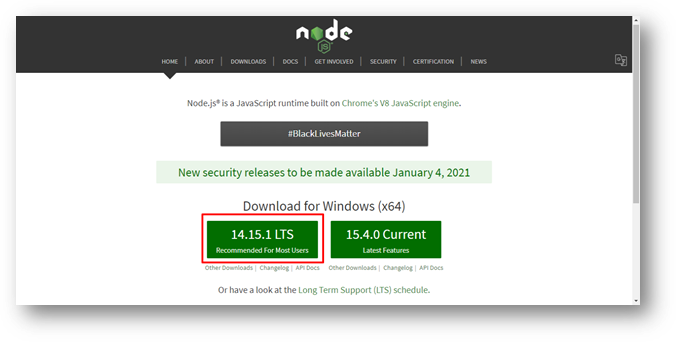
Download Node.js from its official website as per your operating system. Click on “Recommended for Most Users” to download the stable version. You can also install nvm for switching between multiple npm versions.
Npm includes a tool known as npx that runs the executable packages. Npx will help to create a react application in the directory where we run the command. We can create a new project by running the npx command which will also install the required dependencies. In simple words, npx is a package runner tool that’s included in npm.
To check the version of the node run the command
Node –vTo check the version of npm run the command
Npm -vPlease note that to work with create-react-app, the version of npm should be at least 5.2.0 and the version should be at least 8.10 because previous versions don’t include npx. You can check the version of npm using the command given above, if you find that the version is not compatible then you can set up NVM in your system and switch to the latest version available. To setup, up NVM refer the section given below.
Install NVM
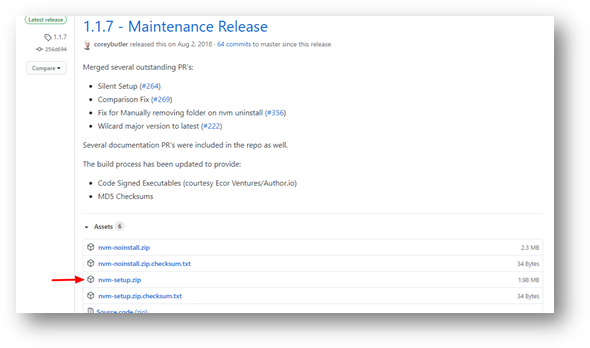
To download NVM visit the link and download the nvm-setup.zip file.
Once the file is downloaded open the folder and run the file nvm-setup.exe file. Follow the steps and go through all the steps required for setup.
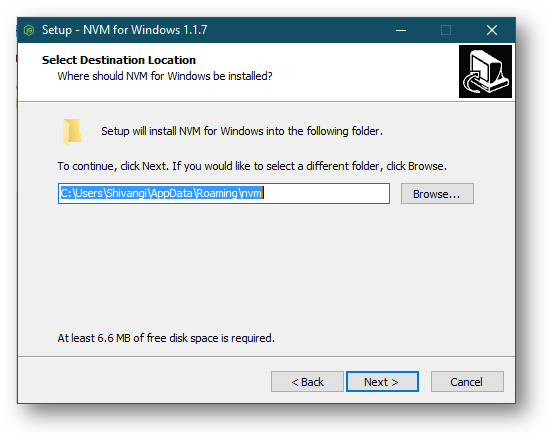
Click on the Next button and follow the steps required.

As you follow the steps you will finally come to the window asking for installation. Click on the install button to install your NVM setup.
Once the installation is complete, let’s check for the versions of the node available in our system. To check that use the command
nvm list
This will show the list of all the installed versions of the node. Currently, in my system, only one version is installed which is 10.15.1

To check for all the versions available run the command:
nvm list available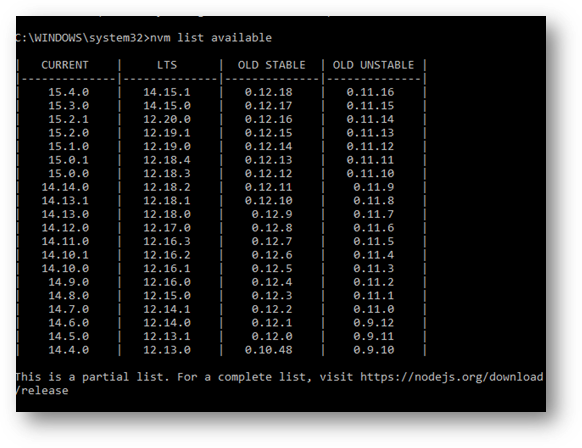
We are now all set to start working with CRA and create our first single-page application (SPA) without the overhead of setting up the configuration. But yes, before starting to create the application let’s understand what actually is CRA.
What is create-react-app?
According to the React documentation, create-react-app is one of the officially supported ways to create single-page applications in React. Create React App is a comfortable environment for learning React and is the best way to start building a new single-page application in React.
We would need to deal with babel and webpack configurations if we want to configure react manually. If we use CRA instead of manual configuration, CRA would install all the necessary packages with a ready-for-development react application. Now let’s create our first single-page application using CRA.
How to create react app?
To create our application, open the directory in which you want to create your application in VS code. You can also use the terminal to create your application. The syntax for the command is as given below:
Syntax:
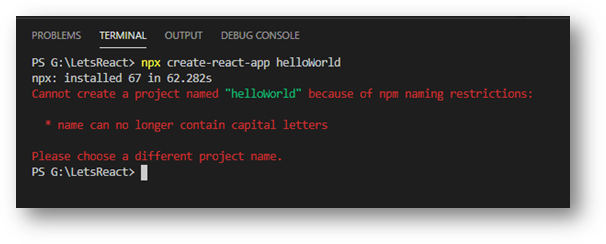
npx create-react-application project-nameHere the “project-name” would be the variable that indicates the name of the project that we want to use. Let’s create a project named hello-world with CRA. You can copy the command given below:
npx create-react-application hello-worldI tried using a capital letter in the name of the react application but due to naming conventions for the project we are not allowed to use a capital letter in the name of the project but yes hyphen (-) and underscore (_) are allowed. Using capital letters in the application name I got the error as shown below, so it is recommended to use a hyphen or underscore as separators.
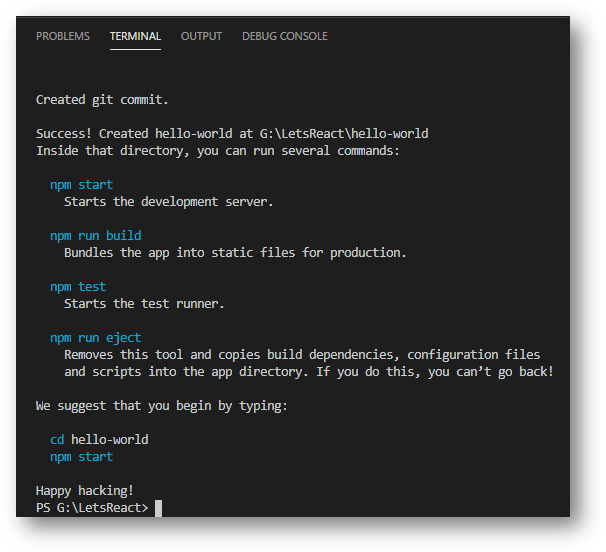
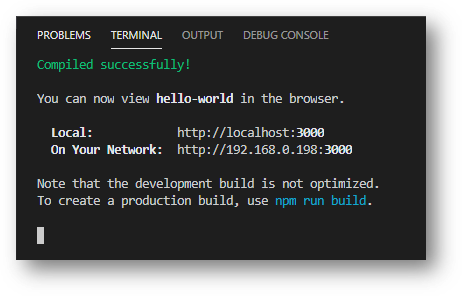
A directory named “hello-world” will be created with all the dependencies installed. Once the command runs successfully you will see the messages as shown in the image below. This indicates that the directory of your project with all the necessary files has been created.
Now you would be able to find a new directory inside the folder in which we ran the command for creating the application. The name of the directory will be the project name that we provided in the npx command.
Explore the files created
To explore the files created and the dependencies installed you need to navigate to the root folder that is created, in this scenario directory name would be hello-world.
Navigate to the project directory created using the command:
cd .hello-worldThe project created has the file structure as shown in the below image:
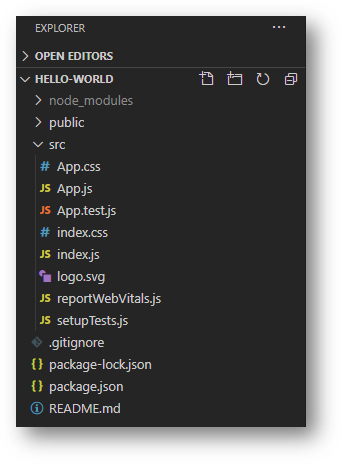
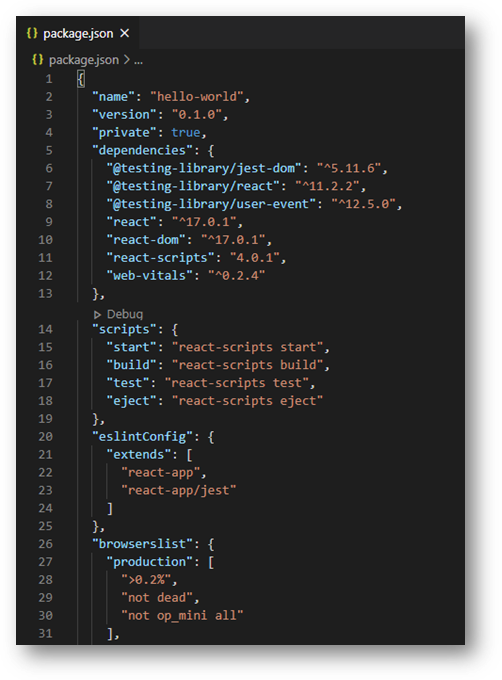
The “src” folder includes all the source code for the project. packae.json file includes all the dependencies required for the basic application to run. For example, the scripts to start, build, test, and eject.
Running the project created by CRA
To run the project that we created using the create-react-app, we need to step into the directory that has been created. If you haven’t changed the directory then, use the command given below to change the directory.
cd hello-worldNow run the command to run the project locally.
npm start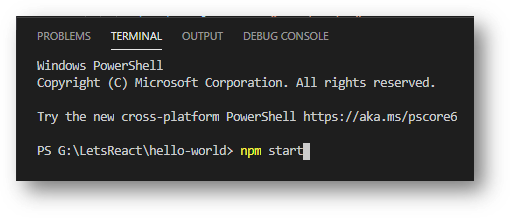
Running this command would launch the browser and visit the URL “http://localhost:3000/” to run the project in development mode. If the project doesn’t have any compilation error then you would be able to see the message compiled successfully.
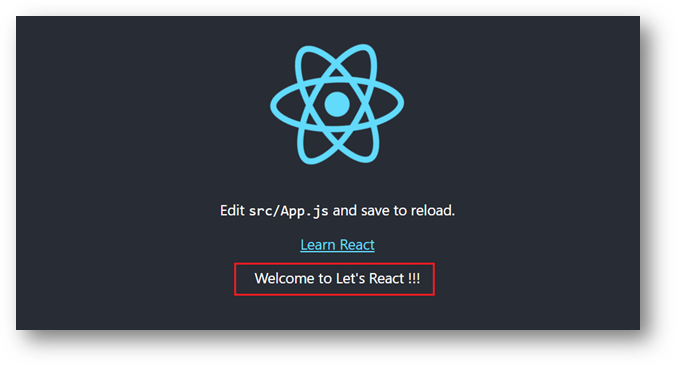
The default page of every React project is shown below. The page that we are seeing currently is the JSX returned by the App.js component. To make some changes open the App.js component.
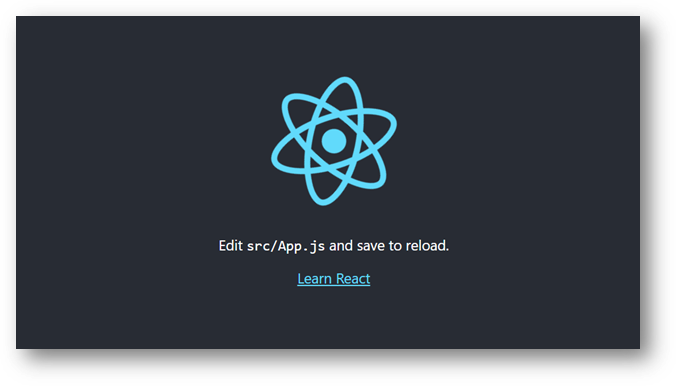
If you are seeing something like the image shown above, then you are good to go and ready to start working with React. To see your changes, edit your app.js file and save the file.
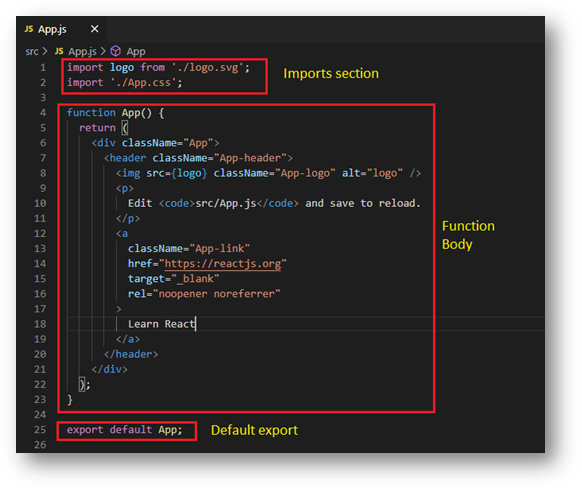
Sections of the App component are divided into basically 3 sections, first is the imports section that includes all the imports required for the component, second is the function body component that has the logic for the function and the JSX that the component would return and the last section would be the default export section.
Let’s make some minor changes so that we can see our changes in the browser as we save the component file. By saving the file you would be able to see the changes that we have added as the URL would reload automatically.
Summary
In this article, we learned about how to create a single-page application using create-react-app. We also learned about the steps to install Node.js if you don’t have it installed already. If we have multiple versions of node installed then we can use nvm for switching between the versions. We also learned to create the application using the command, keeping in mind the naming conventions. To successfully check our application, we made changes to the app component that were reflected in our development server.
Some articles to learn more about React
What Is React?
Why use React?
Deploy React Application on IIS Server
![]()


11 Replies to “How to install React.js with create-react-app?”